
Building a DIY environmental sensor for under R550

I built a homebrew environmental sensor that cost R535.90, and found that there were very few benefits over buying a commercial version of the product.
Some time ago, I came upon the idea that it might be useful to track temperature and air quality statistics at home and around the office.
I found a variety of sensors available through local online retailers, but most of these seemed to either only measure one metric or be very expensive.
These sensors also operate independently, without the ability to transmit the measured data to other platforms.
Being a tinkerer, I challenged myself to build a device with sensors that could measure at least temperature, humidity, carbon monoxide levels, and an air quality metric.
The entire sensor package should cost less than R500 and be able to connect to Home Assistant, share measurements with the platform, and operate independently.
Having used Home Assistant several times before, I immediately decided to use the ESPHome framework.
This allows users to program commonly available ESP microcontrollers priced at R112.70 as sensors that integrate easily into Home Assistant.
An alternative would be to use the Arduino IDE, as it can also be used to program ESP microcontrollers and has libraries available that make it easy to interface with nearly any sensor.
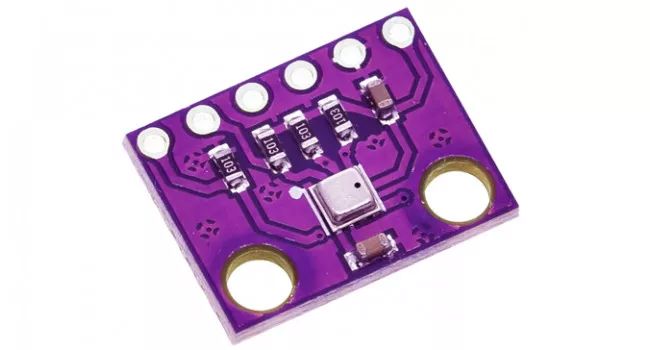
Regarding the sensors themselves, I found a BME280 sensor from a nearby electronics retailer for R78.20 that would be able to measure temperature, humidity and air pressure.
For the remaining measurements, I opted to use MQx sensors. These are a series of gas sensors that all share the same footprint and are sensitive to different gases.
They are available relatively cheaply from various electronics retailers for around R50 each. I got a pack that included nine different sensors, allowing us to choose what we would like to measure, for R345.
Integrating the components


Once we had all our parts, we started putting everything together and soon ran into the first issues.
While reviewing the sensor datasheets, we noticed that the MQ-7 and MQ-9 sensors, which are sensitive to carbon monoxide, require different control circuits than the other sensors.
These control circuits were not implemented correctly on the cheap sensors we purchased, which meant we had to work around the issue.
The standard sensors all take 5V in and output a voltage proportional to the measured gas concentration, which is easily read using the ESP board.
The carbon monoxide sensors, however, need to cycle between 5V to burn off other gases, and then 1.5V to measure carbon monoxide levels.
Luckily for us, the ESP supports pulse width modulation outputs, allowing us to vary the voltage going into these sensors through a cheap transistor.
The BME280 sensor was easier to set up, as it communicates over the I2C serial protocol. This means that we only needed to connect power, ground and two communication wires to the sensor.
Firmware vibe-coding test

Writing the firmware was easy with some AI assistance. However, the large language model still made several significant errors that required a human hand to resolve.
ChatGPT was able to create an outline of the firmware, implement calibration steps, and develop a web portal to monitor values.
It also attempted to perform the mathematical conversion from raw voltages output by the sensors to actual gas concentrations.
However, we had to fix several syntax and naming errors to get the code to compile, and we noticed that some of the values we were getting were quite strange.
We discovered that ChatGPT did not understand the sensor datasheets nearly as well as we had led ourselves to believe, and we ultimately had to redo most of the maths and calibration steps.
The sensors output a voltage which is relative to the gas concentration, but this relationship contains a few variables that need to be calculated or calibrated.
The sensor acts as a resistive voltage divider, with one part being fixed and the other varying with the concentration. The ratio between these resistances follows a logarithmic curve corresponding to the gas concentration.
While the one resistance value is known, the other needs to be calibrated in a lab, or by running the sensor in “clean air”, and assuming a specific gas concentration.
This type of calibration is very rough and will not result in perfect values. However, the values can be compared over time.
Eventually, after more than 20 iterations of our firmware, we had a sensor that read reasonable values when calibrated, operated standalone or connected to Home Assistant.
It could also read temperature, humidity, pressure, carbon monoxide levels, volatile organic compounds and combustible gases.
Getting readings and packaging the sensors
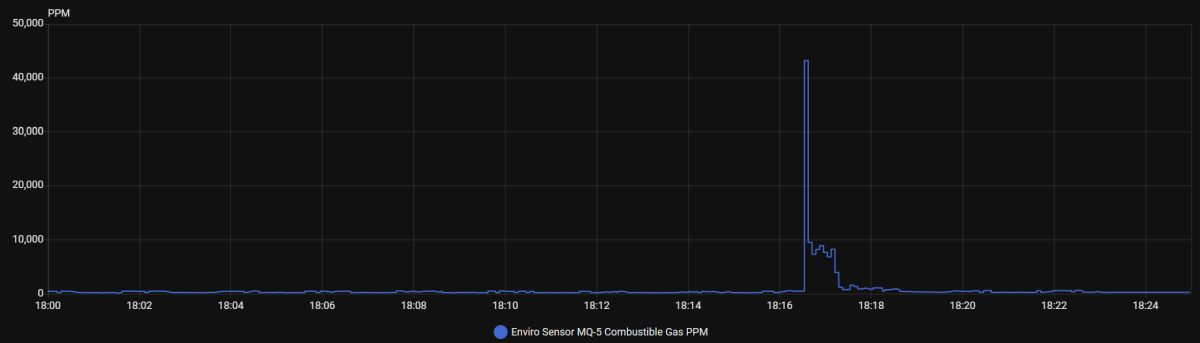
Temperature, humidity and pressure all correlated well with commercial sensors we already had. Opening a LPG burner without igniting it near the sensor sends the combustible gas sensor values sky high.
Breathing into an enclosed container increases the carbon monoxide reading to a value of around 20 parts per million, compared to the usual value of under five parts per million.
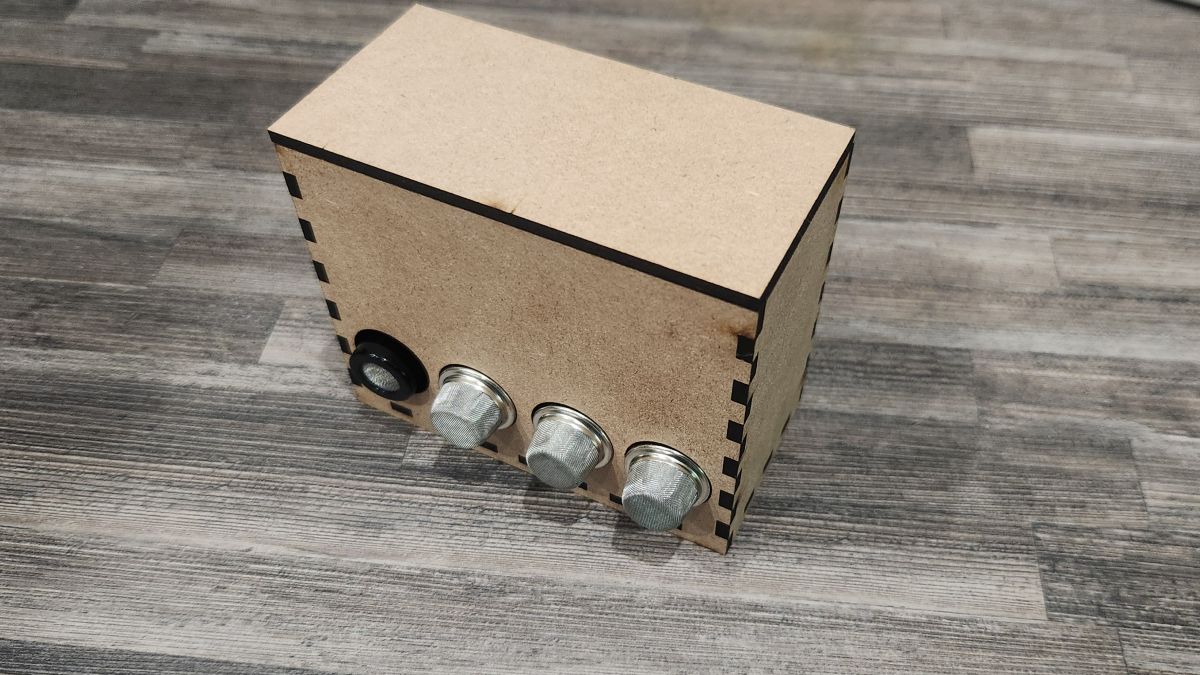
This makes sense as the sensors are also sensitive to carbon dioxide. Finally, we enclosed the sensor in a laser-cut wooden box, making it easier to move around and test in different locations.
Overall, the project was a success, but it required a significant amount of time and tinkering. Although we spent R535.90, it would have been closer to R380 if we had bought loose sensors instead.
Buying an off-the-shelf unit is generally the best option for most people, unless you’re willing to spend hours understanding the intricacies of each sensor and still struggle to get them to work.
This project highlights how difficulty can vary in projects, as building the temperature and humidity part of the sensor took minutes, compared to days of tinkering to get the MQx sensors working well.
Photos of the completed project


 Loading ...