
I built a web server using a Raspberry Pi — and hosted my own website on it

A Raspberry Pi is a versatile computing device with many functions, including using it as a webserver to host your own website.
Raspberry Pis are single-board computers widely used in DIY electronics projects and as a learning tool.
We decided to put the device to the test as a web server.
To create a web server using Raspberry Pi, you need the basic board, a MicroSD card with 8GB or higher capacity, a power supply, and an Internet connection.
Due to the global chip shortage, finding a new Raspberry Pi board proved difficult. Luckily, we had one available from a previous experiment.
We used a Raspberry Pi 3 Model B+ for this project and powered it with a Micro USB cable from a charging brick.

We started building a web server by installing the 64-bit headless version of Raspbian onto our MicroSD card.
This can be done with the tool downloadable from the Raspberry Pi website.

After installing the operating system, we created an empty file named “ssh” on the boot volume to enable the SSH server.
The network configuration can also be done on the memory card, but we opted to connect directly to the Pi with an Ethernet cable and continue the setup through SSH.
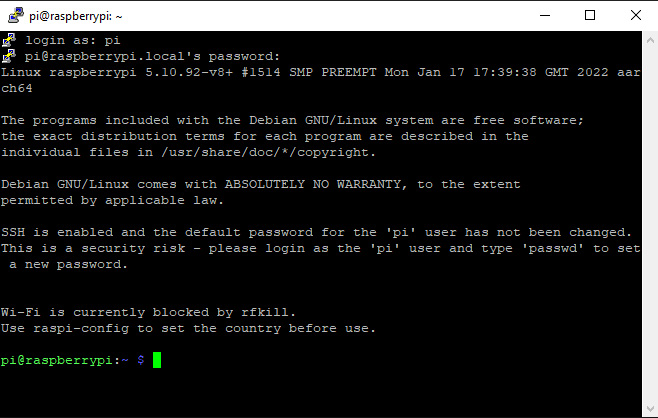
We used Putty to connect to the Pi. After logging in, we changed the default password and continued with the standard setup.
We worked through the options available in the raspi-config menu and ran the “apt update” and “apt upgrade”.

Once the Pi was configured, we followed online guides to install Nginx for the webserver and Node.js for the JavaScript application we wanted to test.
We also set up a static private IP for the Pi on our network and forwarded port 80 on the router to make the server visible on the Internet.
To host the device on a mobile connection, you must use the unrestricted APN for the specific network.
These are available at request for Vodacom and Cell C customers and is enabled by default for most Telkom Mobile and Afrihost Air Mobile connections.
An online port checking tool can be used to manage connections to your server. Alternatively, you can start the Nginx server and browse your network’s public IP address using a device on a different network.
You should be greeted with the default Nginx page if everything went well.

Since we used a regular consumer Internet connection without a static public IP, we needed a Dynamic Domain Name System (DDNS) service.
This will keep a domain name up to date with our actual IP so that the website is easily accessible to the public.
We used No-IP as it offers a free service and a guide to using it on a Raspberry Pi.
We verified that everything was working by browsing to the hostname we set up and getting the expected Nginx welcome page.
As this server was set up to show off the possibilities, the next order of business was to find an open-source game that we could host.
After a short search, we came upon a Snake Game by Caio Paiola on Codepen and downloaded the source code.
We copied the source code onto the Pi and got it running after some troubleshooting.
All that was left to do was set up crontab to automatically restart the server on a reboot. This is not necessary but saves you the trouble of manually restarting the server after a power outage.
The site loads quickly, and after playing the snake game for a minute, it is easy to forget that it is hosted on a Raspberry Pi standing on my desk.

This is a perfect afternoon project for someone learning about web development, where they can put newly-learned skills into practice.
Using a Raspberry Pi also simplified the project as technical support is readily available and easy to find using Google.
- You can access the website hosted on the Raspberry Pi here – mbbtestserver.ddns.net
The website will be available for a few days. It should be noted that the server will be down when the mobile data connection drops or there is a power outage.
Now read: I built an ambient backlight system for my computer screen for R600


 Loading ...