Archers custom chassis work log

Obviously, I already have the GPU in my hands, so the purpose of your comment is to...? Regardless, I'm reasonably sure I've chosen well, I may even surprise you guys with what I ended up getting ;) Only time will tell... You may also want to double check those pro Kepler rumours, it turns out Nvidia allegedly paid people to start those rumours.

Now then, moving swiftly along. The next hint!

attachment.php

attachment.php


:D
 
Last edited:
Obviously, I already have the GPU in my hands, so the purpose of your comment is to...? Regardless, I'm reasonably sure I've chosen well, I may even surprise you guys with what I ended up getting ;) Only time will tell... You may also want to double check those pro Kepler rumours, it turns out Nvidia allegedly paid people to start those rumours.

Now then, moving swiftly along. The next hint!

:D

Really? Oh my! Any proof links.

I presume time will tell very soon.
 
3 more days until I can give a real update again :D
Until then, if anyone is good with Windows scripts (and/or Arduino code), help me asseblief - linky
 
GPU is in! Ran a quick furmark, and OC'd a bit, and it still looks like its all there. Now to take it back out and slap on that water block :D
 
Picture time!!

For those sensitive viewers out there, avert your eyes, naked GPU's lie ahead. And ponder had it spot on with make and model, keen eye you got there

attachment.php


And then after some careful work...

attachment.php

attachment.php


And then after a lot of work (I forgot how difficult it is to get the tubing on)

attachment.php

attachment.php

attachment.php


And thats all for now I'm afraid. Busy leak testing it which is why you'll see nothing is plugged in, would like to hit the 12 hour mark at least before I think its safe. Will likely be finishing up the last of the lighting on Saturday (SSD mount, CPU block, fans), so with a bit of luck, should have some decent pics up come Monday :D
 
Not a real update, sorry guys :p
But I did finally make time to go fetch some sleeving tools, which means I can finish up the wiring on the lights, as well as the sound card. Then with a bit of luck, the piece for the front buttons will be done on Saturday as well which means..... it will be finished!!! FINALLY
 
Been following this for a while now Archer. I'm curious, is there anything that you would have change, in hindsight with the 680? Also, I have come across a few review where the sabertooth doesn't truly work to it's full potential. I'm in the process of an upgrade at the moment, and in two minds of which avenues to go. Would just like to hear your thoughts on changing if you could.

You do realise that you are the forum god for hardware right?
 
Lol, forum god :D Glad to hear I've kept it interesting enough for you to keep following this long!

680 - I assume you mean the GPU? Nah, I'm happy with what I've got. It basically boils down to me being in the USA during the 7970 launch, and not the 680 launch. So it was much easier and cheaper to pick up the GPU and the waterblock back then in the USA. Had I been stuck in SA all the time, I'd most likely have waited it out to see what both sides brought to the table.

As for the Sabertooth, it performs pretty darn well. Temps are good when the case is closed (since then the airflow is over the board and out the top, vs immediately out the sides). I like the clean look, though the next build will have the mobo exposed for sure (different theme entirely). It easily got me to 5GHz on my CPU, and I've been brave enough to push 106 bclk during overclocking runs, but thats luck of the draw, some boards will do 102 max, others 110. The only bad thing I have to say about it is that it doesnt have a windows based OC tool (it doesnt have the chip to do it) so when you fiddling with overclocking you have to keep rebooting. Oh, almost forgot, sleep + SSDs doesnt seem to work well. Havent checked lately if a new bios sorts it out, but it hasnt bothered me too much so far.

As for the case itself, plenty of stuff I'd like to change, or do differently next time. But I'll keep that for when I wrap things up. Like a little final chapter :)
 
Ooooooooh, whats this!?!?

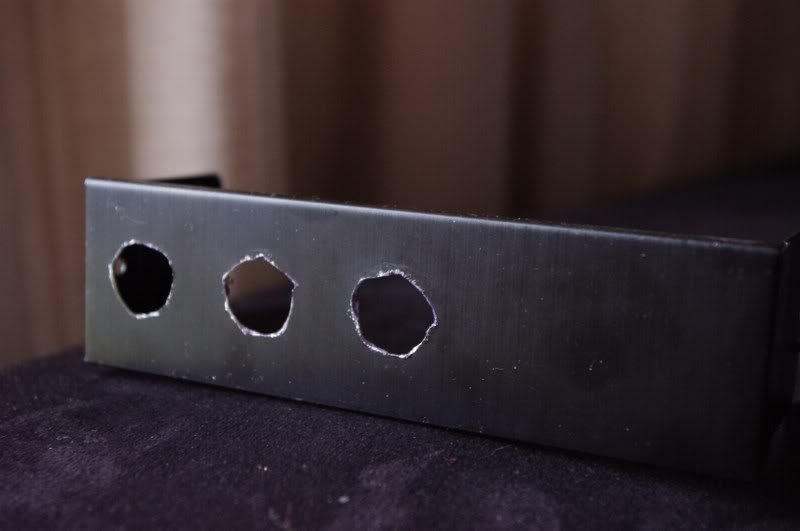
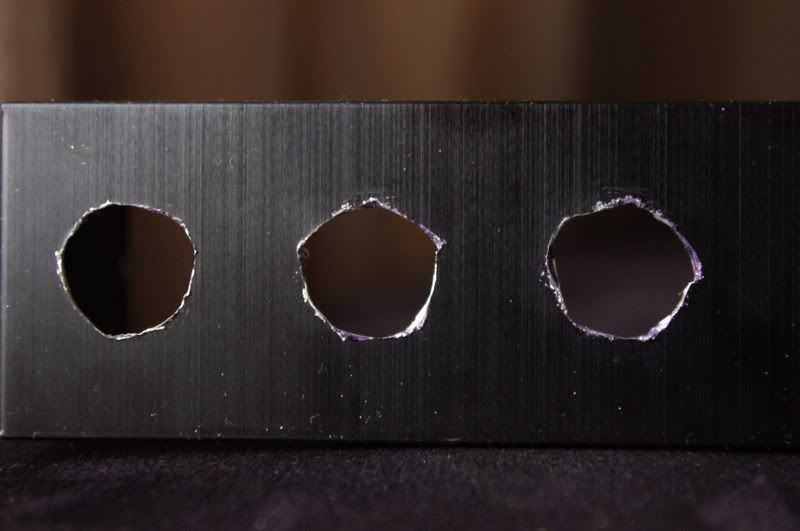
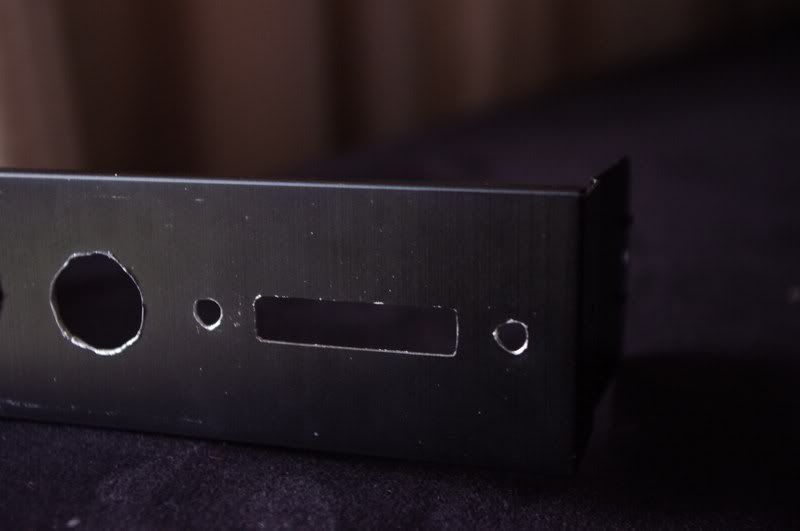
The old button bay cover thingamabob. See how horrible those holes were made? Ya, I'm a noob. For the life of me I couldnt get the piece to stop vibrating no matter how much I tightened the vice. The result was horrible hurricane shaped holes, that were too big, especially after I tried rounding the holes more with a file. You couldnt really notice it unless you were close by, but thats simply not good enough.

184_buttoncover.jpg

185_button.jpg


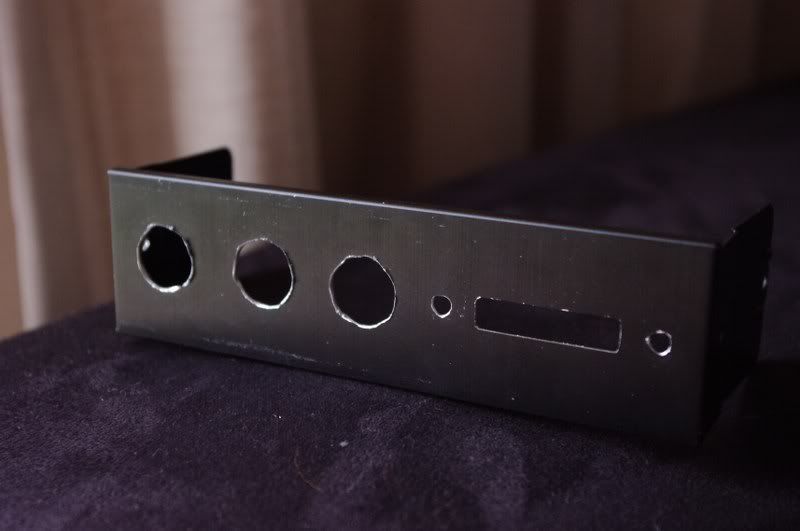
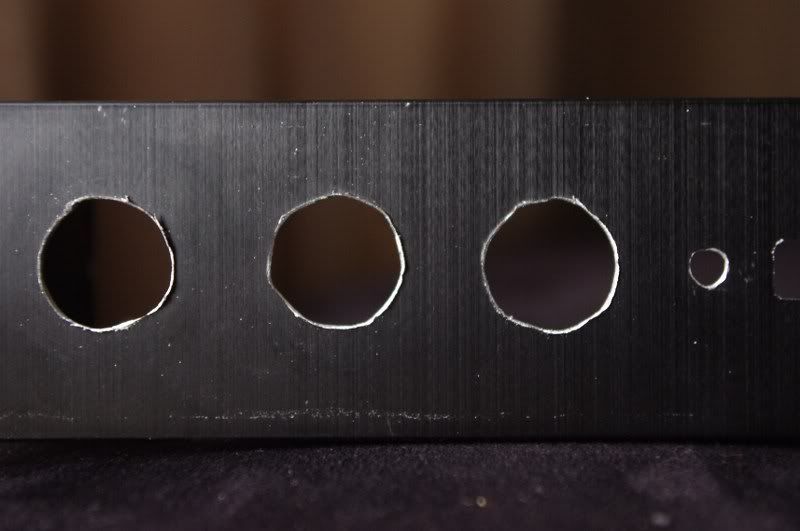
So take 2.... muuuuch better dont you think? The trick was clamping it down differently and having a backing piece. The problem was that with such thin metal, and such a big drill bit, the forces were too great for it while clamped on the sides. Having a backing piece also help stop the bit from wandering at the tip. Then having clamps on the front side of the cover also helped stopped vibrations. Still need to clean up the edges a bit, but its getting there

186_button.jpg

187_button.jpg


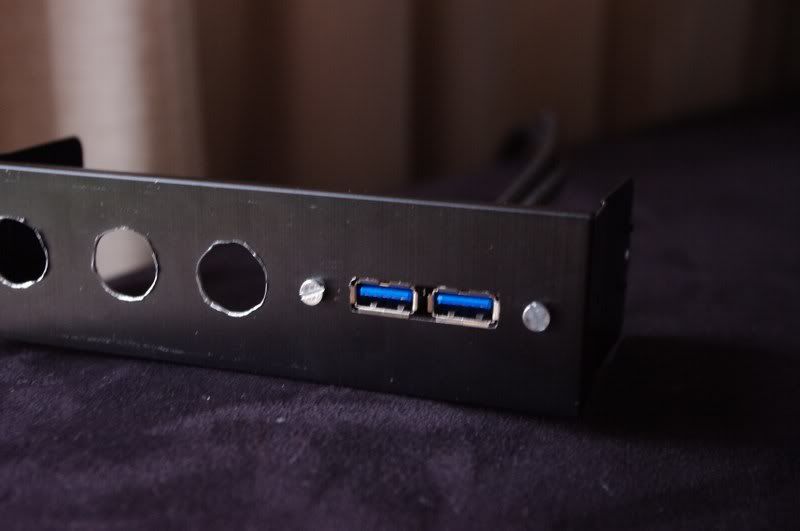
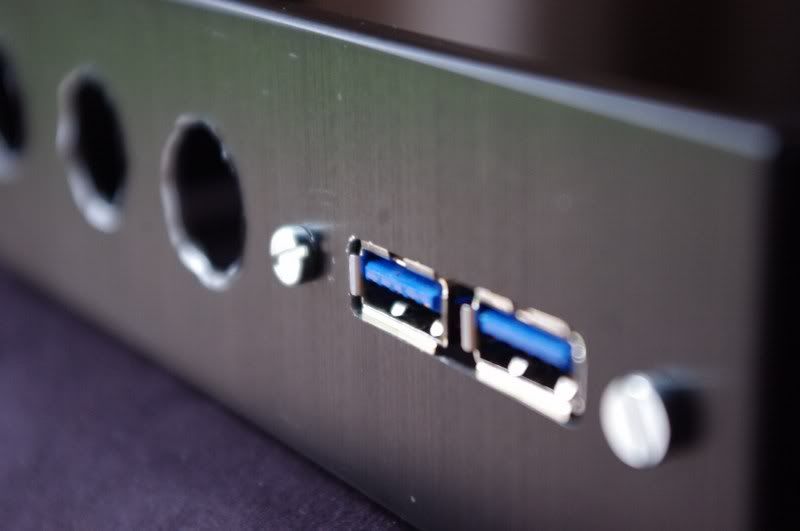
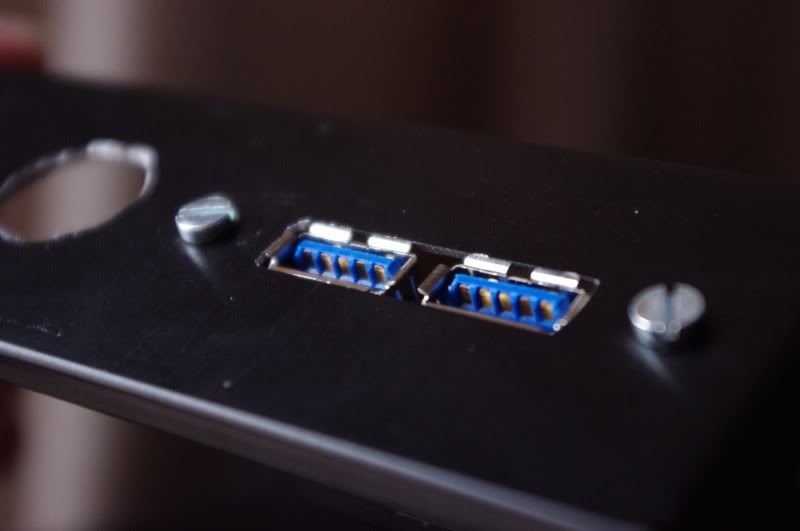
On to the USB ports... some careful Dremel work, and lots and lots of filing gets you (even if I say so myself) a perfect fit. The only thing left to do here is find some M3 hex screws, which seems to be impossible in SA. For now I'm going to leave it with these screws, and when I get some more stuff from MDPC I'll switch em out.

188_usb.jpg

189_usb.jpg

190_usb.jpg

191_usb.jpg


Thats all for now, time for some BF3, hehe. Check back tomorrow when I've hopefully got everything 100% done!

PS - using photobucket right now, MyBB upload was giving me some issues. Sorry if you cant see the pics because of this
 
Last edited:
Archer,

Did you start off by drilling small pilot holes and then incrementing the bit size step by step?

You also get small conical grinding stones that give a nice finish, instead of cutting through the metal and making that weird shapes with a drill bit it gives you a perfectly round hole. Also very handy for removing burs.

$(KGrHqYOKo8E1qqW7e1EBNev2fmvYw~~_35.JPG
 
Yes I did that, even slowed the drill speed as I got to bigger bits
I tried 3mm pilot -> 16
3mm -> 8-> 12-> 16

If its not clamped correctly, nothing is going to work. Havent seen those grinding stones before, will keep them in mind next time :)
 
Meh, asked for 3mm nuts, but got given 4mm and only found that out yesterday, so couldnt fasten the bay cover properly :/
 
Top
Sign up to the MyBroadband newsletter
X