Jean Claude Vaaldamme
Honorary Master
- Joined
- Jan 18, 2020
- Messages
- 10,029
- Reaction score
- 10,923
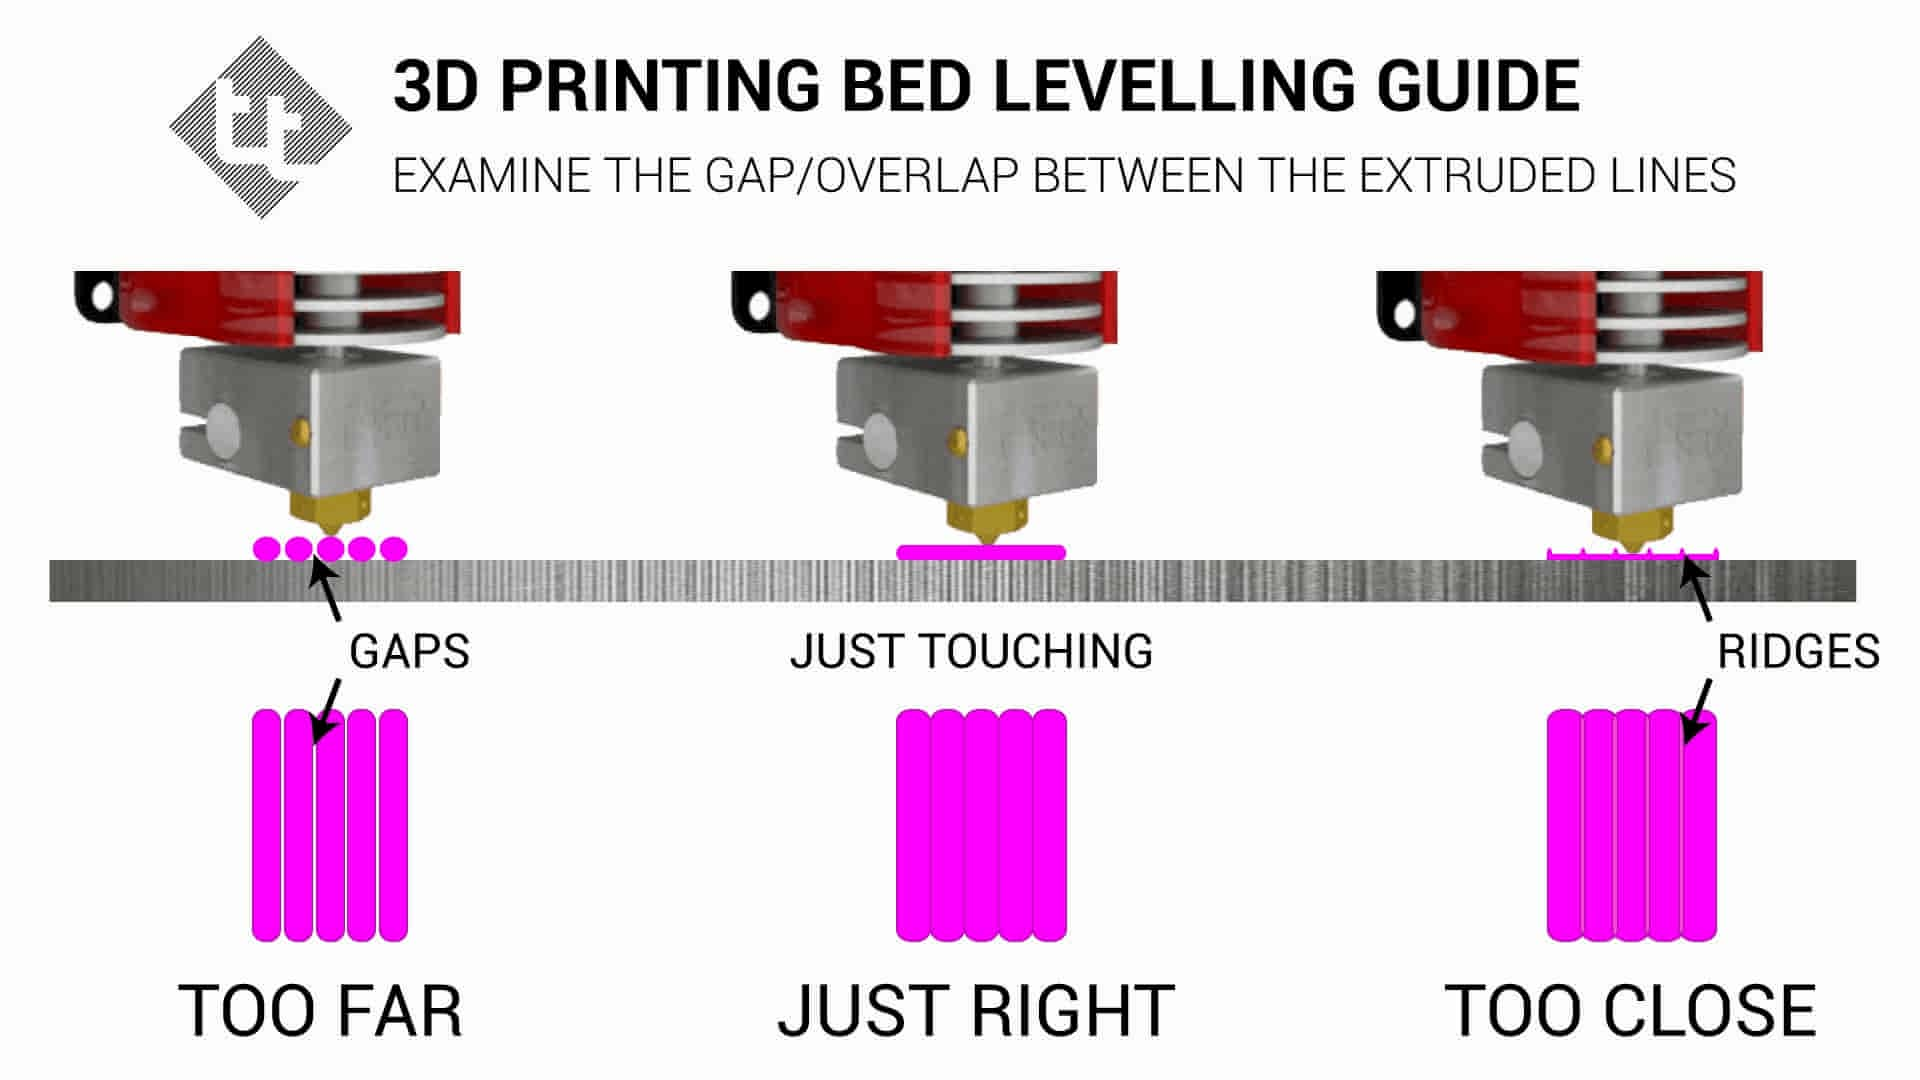
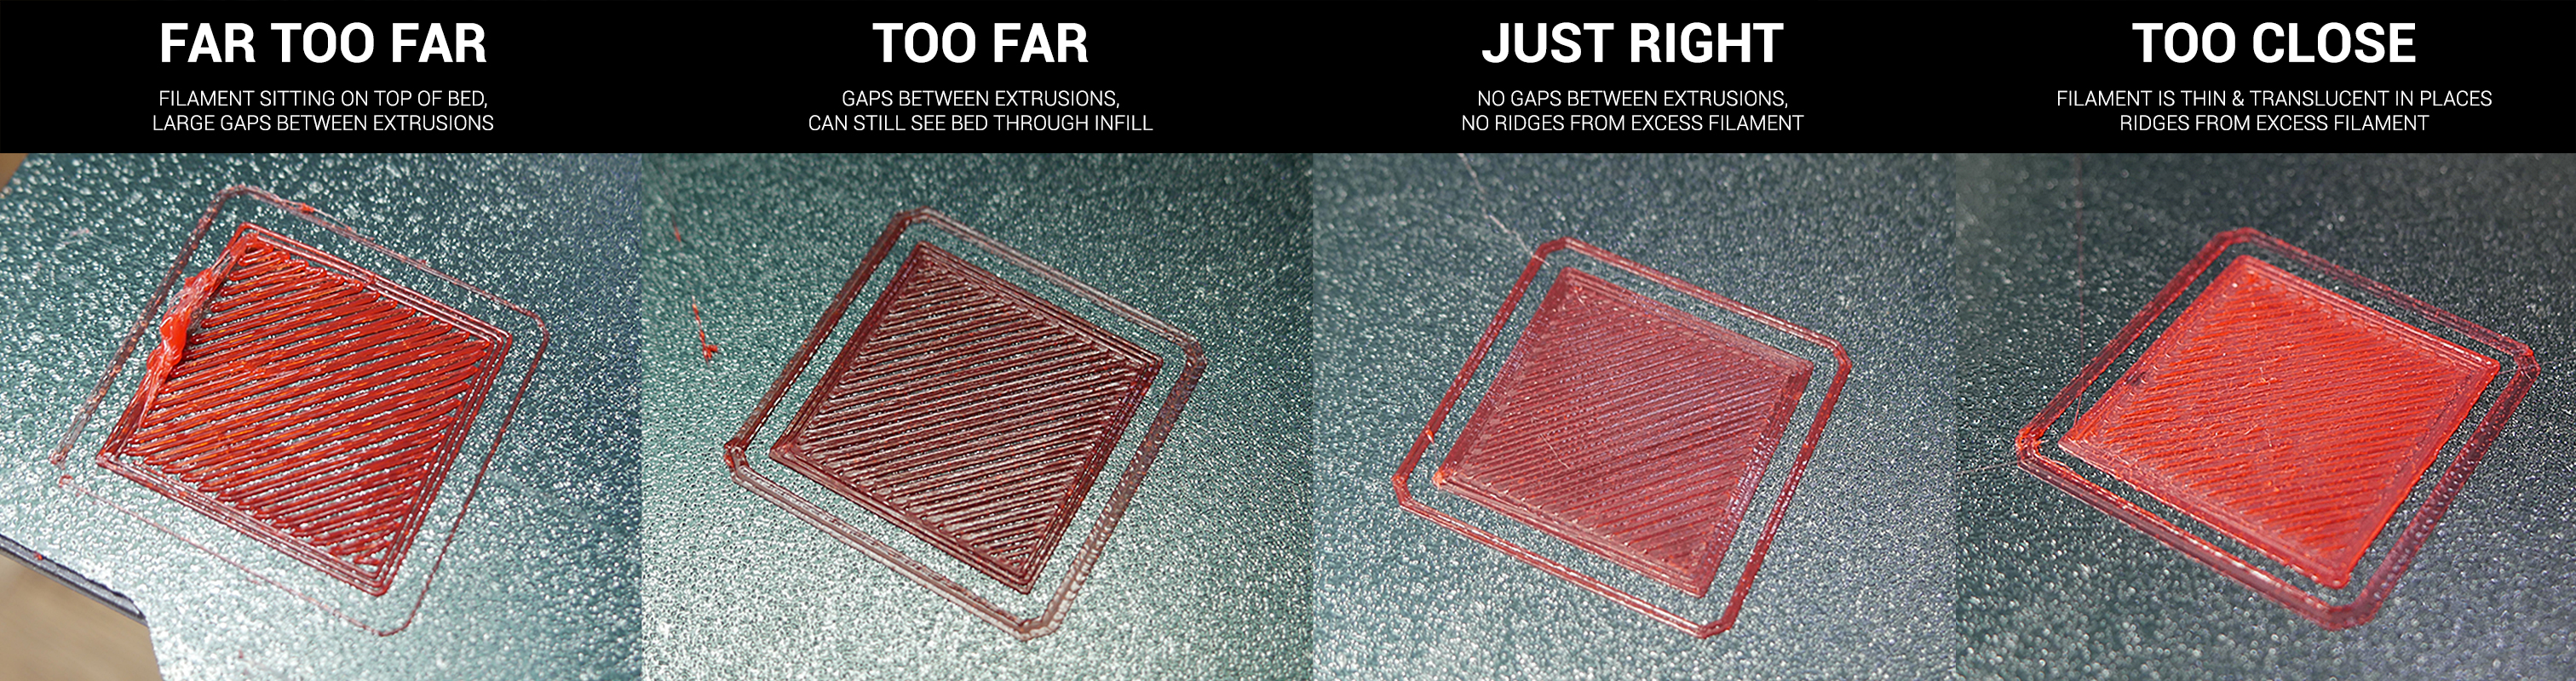
And these temps they give. Like 185-205. Is it best to start in the middle of that temp or more toward high or lowThere's something off about your model though, like the walls are too far apart.
Have you tried a calibration cube? Looks a little high too. Remember , petg uses a higher z, pla likes to be more squished, you need to alter the setting for the new material. And check temps as per the filament you purchase . Even same type can be different per manufacturer and colour.
For example, cctree can go like 185 for low and 205 high, sunlu likes 200/205 to start. That's why temp towers are important.


.jpg")
.jpg")
.jpg")
.jpg")
.jpg")